Our first tiling experience was on our main level bathroom floor that is 6' x 3'. We thought that would be a nice, small space to learn the tricks of laying tile.
Let me tell you, we learned LOTS. The first thing we did was purchase the Home Depot 'Tiling 1-2-3' book which proved to be very helpful. We read through the directions and gathered the supplies we needed: WonderBoard, screws, thin-set, notched trowel, ceramic tile, spacers, grout, grout float, grout sealer, sponges and a tile scorer.

We got to work ripping up the existing linoleum and luan subfloor. We cut the WonderBoard (which was a crumbly mess!) to size and screwed it down. The next step was to measure the center of the floor to begin laying our tile on a diagonal. We made our chalk lines, mixed the thin-set and got to work. Everything was going great until we got to making the cuts.
The worker at Home Depot said a tile scorer would do the job for the tile we had chosen. Boy was he all wrong! We scored and scored and scored and tried to snap the tile and it was a mess. We were not getting any straight lines and were working against the clock. The thin-set was drying and we didn't have tiles to put down. Our first experience proved to be very frustrating.
Lessons learned:
1. Lay tiles out on the floor and make your cuts before mixing any thin-set
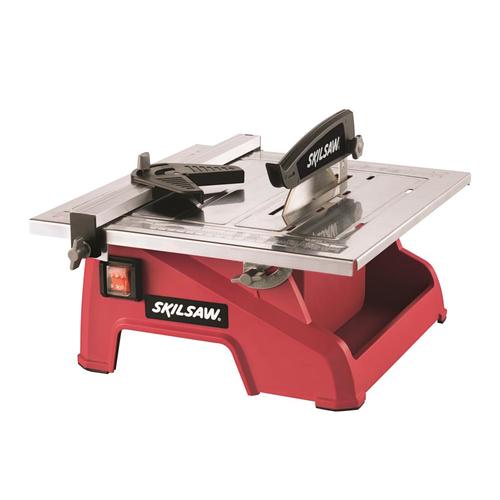
2. Buy a wet tile saw no matter what someone tells you
3. Next time use HardieBacker, it doesn't make such a mess
We went out the next day and purchased a basic wet tile saw, nothing too fancy. We marked the tiles with a wax pencil and made the cuts.. much easier!
Our next tile experience was our guest bathroom upstairs. We followed the same steps: remove old floor, lay HardieBacker, find the center, lay your first tile down and continue tiling the floor. In our case, I laid the thin-set and tiles while Greg ran up and down the stairs to make the cuts. Our second experience was definitely a positive one.
We are now currently working on tiling shower walls. This was our second experience doing walls, the steps are very similar. Our first experience tiling walls was our kitchen backsplash. I hope to do a separate post on this soon.
We put our HardieBacker up, screwed it in and taped the joints.
We then began by measuring a level line across the bottom of the big wall. Due to the pitch kit on the floor, the bottom of the wall will not have full tiles all the way across. The technique we used was measure the center where the full tile would be, draw a level line across the whole wall based on the height of the center tile, then place a piece of wood across this line. This would give us a level starting point to start the first set of whole tiles. The wood also prevents the tiles from sliding down the wall.
We hot glued this piece of wood to the HardieBacker and applied even pressure for about twenty seconds. It is now finally time to begin the tiling process.
We started by marking the center of the wall so the tiles would look even on both sides. We also took the time to measure the center of the tile, to make sure everything would be even steven. Grab a damp sponge and run it over the HardieBacker area you will work on first. The HardieBacker absorbs moisture fast so the water will allow more of your thin-set to stay on the surface for the tile.
Apply a generous amount of thin-set with your trowel on the wall.
Once you have a good amount on the wall (I approximated 2 rows of tile at a time) turn your trowel to the notched side and pull the thin-set at a 45 degree angle.
The worker at Home Depot recommended this thin-set for subway tiles because there was time to wiggle once the tile hit the wall and it gave a nice suction. We were all for it because it was pre-mixed, which meant we could stop and start as we please.

We worked our way left and right of the center until we reached the end of the wall. Our method was to push the tile down and towards the center, then go back and apply pressure with your palm to the whole row. I measured the size cut needed and Greg ran down the stairs to make the cut.
Before we slapped extra thin-set on the tile, I made sure the cut was correct by gently holding it in place. If the tile was good to go, I added extra thin-set to the back, just like frosting a cookie, to make sure it was a tight seal.
Continue this method until the wall is complete or you are at a good stopping point. We have had a very good experience thus far. The subway tiles we purchased have self spacers on them so we haven't had to worry about that step at all. It has been a lifesaver and made things go much smoother. With some sore knees, our tiling project moves forward and we continue to like the progress we see!
xo, Erin


No comments:
Post a Comment